
T: +86-13302905061
E: sales@dongli2006.com
E: sales@dongli2006.com
Building 101, No.5 Rixing Street, Pingdong Community, Pingdi Street, Longgang District, Shenzhen, Guangdong, China.
Views: 0 Author: Site Editor Publish Time: 2026-09-10 Origin: Site


A jammed bit halts workflow immediately. It turns a routine fastening task into a frustrating mechanical bottleneck on the job site. Bits become lodged in an electric screwdriver due to poor machining tolerances, debris buildup, torque-induced binding, or a failing retention mechanism. This universal issue affects everything from entry-level household models to professional-grade tools used by contractors. Resolving this requires immediate, safe extraction techniques that do not damage the internal gearbox. After extraction, you must evaluate the chuck system to determine if a component replacement or tool upgrade is necessary. Forcing a stuck bit improperly will destroy the internal gearing. We need to apply targeted kinetic force or precise mechanical leverage to break the friction seal safely.
Immediate Extraction: Most stuck bits can be freed using controlled kinetic shock (a firm hand slap or tapping on wood) or mechanical leverage (vise grips) without dismantling the tool.
Root Cause Identification: Frequent jamming is rarely user error, with one major exception: inserting a 1-inch bit directly into a deep shaft. Otherwise, it typically indicates mismatched bit tolerances, a degraded C-ring in the bit holder, or a low-quality chuck mechanism.
Tool Evaluation: If a screwdriver requires constant manual force or pliers to release bits, the retention mechanism is failing, signaling the need for an upgrade to a model with a quick-release hex chuck.
Risk Mitigation: Applying excessive lateral force during extraction can permanently misalign the drive shaft or strip the internal gearing of an electric screwdriver.
Table of Contents
A functional tool allows seamless, one-handed bit changes. When this fails, identifying the exact point of binding dictates your extraction method. You have to understand the mechanical failure point before grabbing the pliers. Different jams require different approaches based on the root cause. Assessing the situation prevents further damage to the tool housing and internal components.
Inserting short 1-inch insert bits directly into a deep hex shaft is a classic job-site mistake. Workers frequently do this without attaching a magnetic extension first. The short bit sinks entirely below the gripping threshold of the chuck. It becomes completely inaccessible to your fingers. Now it is highly susceptible to permanent wedging inside the shaft.
The lack of exposed surface area makes manual removal nearly impossible. The internal hog ring locks into the bit's detent groove, but you have no leverage to pull it out. Many entry-level tools lack a physical stop inside the shaft to prevent this over-insertion. This blurs the line between a simple user error and a fundamental design flaw in cheaper tools.
Tool manufacturers use two primary methods for bit retention. Entry-level models rely heavily on friction-fit bit holders with internal magnets. Professional tools utilize mechanical quick-release chucks with spring-loaded ball bearings. Understanding the difference helps isolate the failure point.
Debris severely compromises magnetic seating in friction-fit models. Metal shavings, wood dust, and drywall particles accumulate inside the holder over time. This compacted debris binds the hex shank against the internal walls. The resulting friction locks the bit firmly in place, overpowering the internal spring mechanism. Mechanical chucks, while more robust, can also fail if the ball bearing seizes due to rust or lack of lubrication.
High-torque applications place immense rotational stress on tool accessories. Driving 3-inch deck screws into wet pressure-treated lumber is a perfect example. Low-grade steel bits lack the metallurgical strength to withstand this force. The bit slightly twists or deforms inside the holder during heavy fastening tasks. This micro-deformation locks the hex edges directly into the chuck walls.
Cam-out damage makes this problem worse. When a bit slips out of a screw head under power, the rotational energy transfers laterally. This creates sharp metal burrs on the bit shank. These burrs act like wedges against the internal retention ring, creating a severe mechanical lock that resists normal extraction efforts.
Dimensional discrepancies between cheap bits and precision holders cause major binding issues. Stamped bits often lack exact 1/4-inch hex tolerances. They might be slightly oversized or feature rounded edges. This creates micro-gaps inside the chuck assembly.
Bits wedge off-axis during operation due to these poor tolerances. The slight misalignment creates a mechanical lock that resists normal pulling force. A high-quality screwdriver paired with a low-quality bit almost always results in eventual jamming. Investing in precision-milled accessories is the only way to eliminate this specific variable.
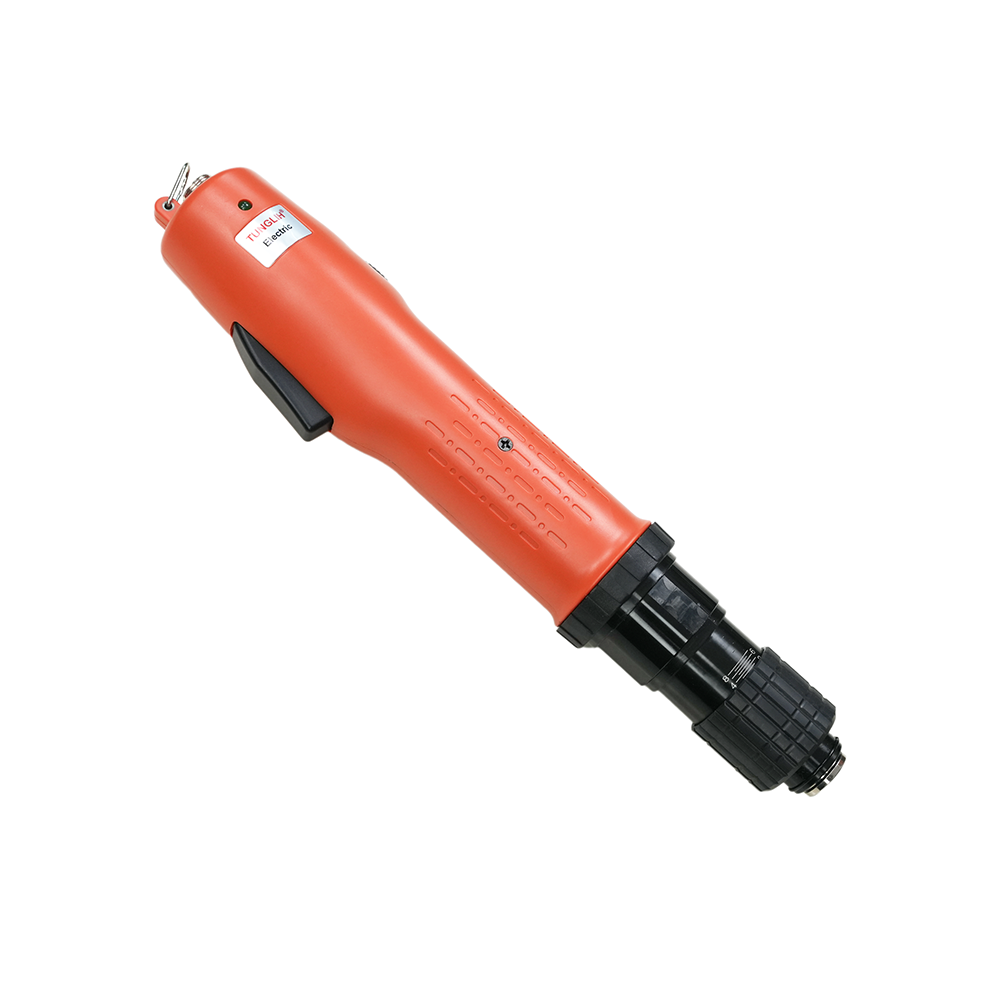
You need step-by-step technical procedures for removing the bit safely. The approach depends entirely on the severity of the jam. Always start with tool-free methods to prevent unnecessary damage to the internal gearbox. Escalating force should only happen when gentler methods fail.

Kinetic shock breaks the friction seal of the internal C-ring. This method requires no additional tools and relies on basic physics. The goal is to temporarily dislodge the retention mechanism through sudden vibration.
The Hand Slap: For minor jams, give the side of the bit holder a firm, quick slap with your bare hand. Strike it perpendicular to the drive shaft. This sudden lateral impact often dislodges the retention ring just enough to release the bit.
The Wood Tap: If a hand slap fails, lightly tap the tool's metal shaft against a solid wooden workbench. You can also use a scrap piece of 2x4 placed on the ground. Ensure you are tapping the metal collar, not the plastic housing.
The Mallet Strike: Alternatively, strike the side of the exposed bit with a non-marring polyurethane mallet. The vibration travels through the metal, releasing the bound surfaces without damaging the tool.
When kinetic shock fails, you must apply mechanical leverage. Standard slip-joint pliers often slip and strip the bit further. Apply locking pliers (vise grips) directly to the exposed portion of the bit. Secure the jaws tightly to ensure zero slippage.
Clamp the vise grips onto the flat sides of the hex bit, avoiding the fragile tip.
Lock the pliers tightly so they cannot slip under pressure.
Pull straight out away from the tool body.
Simultaneously, apply a slight wiggling or twisting motion. This breaks the hex shank's friction seal against the internal walls.
Never bend the drive shaft laterally during this process, as this will destroy the gearbox bearings.
Severe jams require chemical or thermal intervention. Penetrating oils dissolve rust and compacted debris inside the chuck. Apply a few drops of WD-40 or PB Blaster directly into the collar opening. Let the fluid sit for at least fifteen minutes to penetrate the micro-gaps.
Intervention Type | Application Method | Wait Time | Primary Risk |
|---|---|---|---|
Penetrating Oil (WD-40) | Direct drops into the chuck collar | 15-30 minutes | Messy cleanup, attracts future dust |
Thermal Expansion | Heat gun on low setting applied to metal collar | Immediate action required | Melting the surrounding plastic tool housing |
Thermal expansion offers another solution for severe metal-on-metal binding. Apply gentle heat to the metal chuck using a heat gun on a low setting. This expands the outer collar slightly, loosening its grip on the bit. Exercise strict caution here. Excessive heat will rapidly melt the plastic housing of your tool.
You must assess whether the tool meets your daily operational demands. Frequent jamming often signals systemic tool failure rather than isolated incidents. Evaluate the retention system carefully to determine the next course of action. Ignoring a failing chuck leads to ruined bits and lost productivity.
Compare the mechanical reliability of different chuck systems to understand your tool's limitations. Pro-tier tools utilize a spring-loaded collar mechanism. Basic models rely on a magnetic or friction-ring shaft.
Mechanism Type | Retention Method | Jamming Risk | Best Use Case |
|---|---|---|---|
Friction-Fit (Magnetic) | Internal C-ring and rare-earth magnet | High (susceptible to debris and deformation) | Light household tasks, low torque |
Quick-Release Hex | Spring-loaded collar with ball bearing | Low (mechanically locks and ejects) | Professional construction, high torque |
Quick-release chucks physically lock the bit in place using a steel ball bearing. They also actively eject the bit upon pulling the collar forward. This design virtually eliminates friction-based jams. Friction-fit holders degrade rapidly over time as the internal ring loses tension.
Inspect the internal hog ring inside the bit holder. Look closely for visible deformation or a complete loss of spring tension. A flashlight helps illuminate the internal shaft for a better view. If the ring appears flattened, pushed to one side, or missing entirely, the holder is compromised.
Determine if the tool can be serviced by the user. Some models allow you to replace the bit holder assembly easily by removing a single retaining screw. Others have the mechanism permanently integrated into the main drive shaft. Integrated systems require full tool replacement upon failure.
Define the threshold for complete tool replacement. Extract the jammed bit using the methods outlined above. Then, check the drive shaft for lateral play. Grip the empty chuck and attempt to wiggle it side to side.
If the shaft wobbles significantly, the internal gearbox bearings are compromised. The force of previous jams or heavy use has destroyed the alignment. This indicates the tool has reached the end of its operational lifespan and requires replacement. Continuing to use a tool with a wobbly shaft will strip screw heads and damage workpieces.
Balance the cost of premium accessories against the downtime caused by jammed equipment. Upgrading your workflow prevents future mechanical bottlenecks. Proper accessory selection is just as critical as the tool itself. Cheap bits will ruin an expensive tool over time.
Standardizing on 2-inch power bits is the optimal choice for direct insertion. They are perfectly sized for direct use in an electric screwdriver. They extend far enough past the chuck collar to be easily gripped by human fingers.
You can remove them by hand quickly and efficiently. This eliminates the need for pliers entirely on the job site. It speeds up bit changes and reduces frustration during complex fastening tasks. Using 2-inch bits provides the necessary clearance to operate the quick-release collar without pinching your fingers.
Evaluate the return on investment for premium fastening accessories. Invest in S2 tool steel or impact-rated bits. These feature exact 1/4-inch hex tolerances milled via CNC machinery.
Precision-Milled Bits: Maintain exact dimensions, preventing off-axis wedging inside the chuck.
S2 Tool Steel: Resists torque-induced twisting and cam-out deformation under heavy loads.
Stamped Bits: Feature rounded edges and poor tolerances, leading to frequent mechanical binding.
Precision milling prevents torque-induced twisting under heavy loads. Cheap stamped bits deform easily, warping their hex shape. High-quality bits maintain their structural integrity and eject smoothly every time. The slightly higher upfront cost of premium bits pays for itself by saving your tool's chuck.
Establish strict criteria for shortlisting a new tool. Look for all-metal gear housings for maximum durability. Prioritize variable speed triggers for precise control. Always demand a dedicated quick-release chuck over a friction-fit model.
Analyze the operational trade-offs. Higher upfront costs yield significantly better longevity. You experience reduced frustration and flawless bit retention. The initial investment pays off rapidly through increased daily efficiency. Professional tools also feature brushless motors, which provide consistent torque without overheating during continuous use.
Sometimes you must use standard 1-inch insert bits due to space constraints. Always use a locking magnetic bit extension in these specific cases. The extension acts as a sacrificial intermediary component.
It sits securely between the tool and the short bit. If the 1-inch bit jams, it jams inside the cheap extension, not your primary tool. Your expensive screwdriver remains undamaged and fully operational. You can simply discard the jammed extension and attach a new one, keeping your workflow moving.
Prevent a minor jam from destroying the tool entirely. Improper extraction techniques cause permanent internal damage to the motor and gears. Follow strict safety protocols when applying mechanical force. Patience and proper technique are required to save the tool.
Pulling the bit at a severe angle is highly risky. Using excessive lateral force yanks the drive shaft side-to-side. This aggressive action strips the planetary gears inside the tool housing.
Always secure the tool body firmly in a padded vise. Apply extraction force perfectly parallel to the drive shaft. Straight-line pulling protects the internal bearings and preserves the tool's alignment. If you feel the shaft bending, stop immediately and switch to a chemical or thermal extraction method.
Brittle bits shatter easily under extreme pressure. Cheap impact bits are especially prone to catastrophic failure. Using vise grips with excessive crushing force can shatter the metal shank.
This failure leads to dangerous flying shrapnel. It can also leave metal fragments permanently lodged inside the chuck mechanism. Wear safety glasses during extraction. Use appropriate gripping tools and avoid excessive rotational force on the bit itself. Grip the flat sides of the hex shank, never the corners, to distribute the pressure evenly.
Extract the current bit using the twist-and-pull vise-grip method or kinetic tapping.
Discard the deformed or cheap bit immediately to prevent reuse.
Clean the chuck mechanism thoroughly with compressed air and a drop of light machine oil.
Test a high-quality, 2-inch precision-milled bit to verify the tool's internal integrity.
A: Bits typically get stuck due to debris buildup inside the magnetic holder, a deformed internal retention ring, inserting a 1-inch bit too deeply without an extension, or using low-quality bits with poor hex shank tolerances that bind under torque.
A: The tapping method involves giving the chuck a firm slap with your hand, lightly striking the side of the bit with a non-marring mallet, or tapping the tool's shaft against a wooden workbench. This kinetic shock temporarily breaks the friction holding the internal C-ring against the bit.
A: 2-inch power bits are significantly better for direct insertion. They extend far enough past the chuck to be easily gripped and removed without pliers. You should only use 1-inch bits with a separate magnetic bit holder.
A: Yes, applying a few drops of a penetrating oil like WD-40 into the chuck can help dissolve rust or compacted debris. Allow it to sit for 10-15 minutes before attempting to pull the bit out with pliers.
A: Using pliers will not damage the drive shaft if you pull straight out. However, applying excessive lateral force or bending the shaft while pulling can permanently misalign the internal gearbox bearings.


