
T: +86-13302905061
E: sales@dongli2006.com
E: sales@dongli2006.com
Building 101, No.5 Rixing Street, Pingdong Community, Pingdi Street, Longgang District, Shenzhen, Guangdong, China.
Views: 0 Author: Site Editor Publish Time: 2026-09-10 Origin: Site


Verifying electric fence functionality in the field often requires immediate action. When specialized diagnostic equipment is unavailable, operators face a serious operational problem. Unverified fence lines present severe risks, including livestock breaches and security vulnerabilities. However, testing high-voltage pulsed systems—which often operate between 5,000V and 10,000V—with improper or unrated hand tools introduces extreme safety hazards. You cannot treat an agricultural or security energizer like standard household mains electricity.
Evaluating makeshift testing methods requires a strict understanding of tool limitations. The traditional arc test utilizes a standard plastic-handled screwdriver to draw a visible spark to the ground. This differs entirely from using specialized voltage tester tools or dedicated digital fence fault finders. Establishing a clear baseline helps you determine when field-expedient testing is appropriate and dictates exactly when you must stop testing and escalate the issue to a registered fence installer.
Methodology Distinction: Testing an electric fence with a standard screwdriver relies on drawing a visible arc to ground, whereas a voltage tester screwdriver relies on internal circuitry—which may not be rated for high-voltage fence pulses.
Safety Imperative: Heavy-duty insulation is non-negotiable; using tools with compromised handles or inadequate dielectric ratings introduces severe shock hazards.
Diagnostic Limitations: A screwdriver can confirm the presence of a pulse, but it cannot measure exact voltage drop, pinpoint specific grounding failures, or ensure regulatory compliance.
Tool Progression: While a screwdriver serves as a rapid field-expedient check, long-term maintenance requires transitioning to digital fault finders, megohmmeters, or professional intervention for accurate, compliant diagnostics.
Table of Contents
Field testing an electric fence must achieve specific success criteria without injuring the operator or damaging the energizer. You must gather operational data while maintaining a safe physical distance from the live conductor. The method you choose dictates the accuracy of this data and the level of risk you assume. A successful field test must accomplish several distinct objectives.
Verification of pulse presence across the entire fence line.
Rough estimation of pulse strength based on visual and auditory feedback.
Confirmation of basic grounding integrity at the test site.
Identification of dead zones caused by heavy vegetation or broken conductors.
Understanding the physics of the electric fence pulse is mandatory before attempting any manual diagnostics. Agricultural and security fences emit a low-amperage, high-voltage pulse. This voltage frequently reaches up to 10,000 volts (10kV) depending on the energizer's joule rating and the overall impedance of the fence line. Unlike standard mains electricity, which provides a continuous flow of alternating current, a fence energizer releases energy in extremely short durations. These pulses typically last only a few milliseconds, occurring once every second or slightly longer.
This short duration prevents lethal continuous shocks, allowing human or animal muscles to release after contact. However, the extreme high voltage allows the current to jump air gaps and overcome the natural electrical resistance of animal hides, human skin, and dry soil. When you introduce a hand tool into this environment, you are intentionally manipulating this high-voltage behavior.
When you use a hand tool for testing, the metal shaft acts as a temporary conductor. It bridges the air gap between the live wire and the earth. This action creates a controlled short circuit. The high voltage pushes the current through the metal shaft and into the ground. As the current jumps the final air gap between the wire and the tool, it ionizes the air, turning it into plasma. This superheated plasma creates the visible spark and the audible snap you rely on for diagnostics. The tool simply facilitates a localized, temporary fault that you can observe safely if executed correctly.
The standard arc test requires a highly specific design profile. You need a thick, solid plastic, acetate, or rubberized handle. The tool must feature a continuous metal shaft that terminates securely inside the handle material. Tools with metal strike caps extending through the top of the handle are strictly prohibited for this task. The handle acts as your primary dielectric barrier against the 10kV pulse. If the metal core touches your palm, you will receive the full force of the energizer.
The mechanism of action relies entirely on proximity. You ground the metal shaft against a known earth source, such as a galvanized T-post or damp soil. You then bring the tip of the shaft millimeters away from the live wire. The voltage arcs across the gap, drawing a spark. You never make direct physical contact with the live wire during this process.
This method carries significant limitations. It provides only a binary indication of power. You learn if the fence is on or off, but little else regarding the actual voltage drop. The test is highly dependent on ambient light and sound. In bright sunlight, seeing a weak spark is incredibly difficult, and high winds can mask the sound of the snap. Furthermore, this method carries a high risk of shock. If the handle insulation is degraded, cracked, or wet, the high voltage will find a path of least resistance directly through your hand.
Voltage tester tools feature internal resistors and small neon bulbs or LEDs. These include standard mains testers or specialized detector tools used by electricians. They are designed for entirely different electrical environments, specifically continuous alternating current. The user touches the tip to a live wire while grounding the handle end with a bare finger. This completes the circuit, illuminating the internal bulb to indicate the presence of voltage.
Applying standard mains voltage tester tools to a pulsed security array is highly dangerous. These tools are typically rated for 110V to 1000V. An electric fence operates at up to 10,000V. The severe voltage mismatch creates a catastrophic risk of internal resistor failure. The 10kV pulse can instantly destroy the internal circuitry. When the resistor fails, the tool no longer limits the current. This results in tool destruction and a severe shock to the user. Never misapply socket-testing tools to high-voltage pulsed systems under any circumstances.
Dedicated testers define the baseline for proper maintenance and professional diagnostics. This category includes directional fault finders, digital voltmeters, and specialized megohmmeters. Manufacturers design these tools specifically for high-voltage pulsed systems. They feature robust internal shielding, heavy-duty grounding probes, and microprocessors capable of reading millisecond pulses.
The comparative value is immense. Dedicated tools provide precise diagnostic data. They display exact kilovolt readings, allowing you to track voltage drops across long distances. Advanced fault finders indicate the direction of amperage flow, pointing you directly toward the short circuit. Contrast this precise data against the rudimentary feedback of a spark gap test. Dedicated tools eliminate guesswork, protect the user from accidental contact, and drastically reduce troubleshooting time on multi-kilometer fence lines.
Tool Category | Typical Voltage Rating | Diagnostic Output | Safety Profile on 10kV Fence |
|---|---|---|---|
Standard Insulated Hand Tool | Unrated (Relies on handle thickness) | Visual/Audible Arc (Binary Yes/No) | Moderate to Low (High risk if wet or cracked) |
Mains Voltage Tester | 110V - 1000V | Neon/LED Illumination | Extremely Dangerous (High risk of resistor blowout) |
Digital Fence Voltmeter | Up to 12,000V+ | Exact Kilovolt Reading | Very High (Designed specifically for pulsed systems) |
Directional Fault Finder | Up to 15,000V+ | Voltage, Amperage, Fault Direction | Very High (Fully isolated and shielded) |
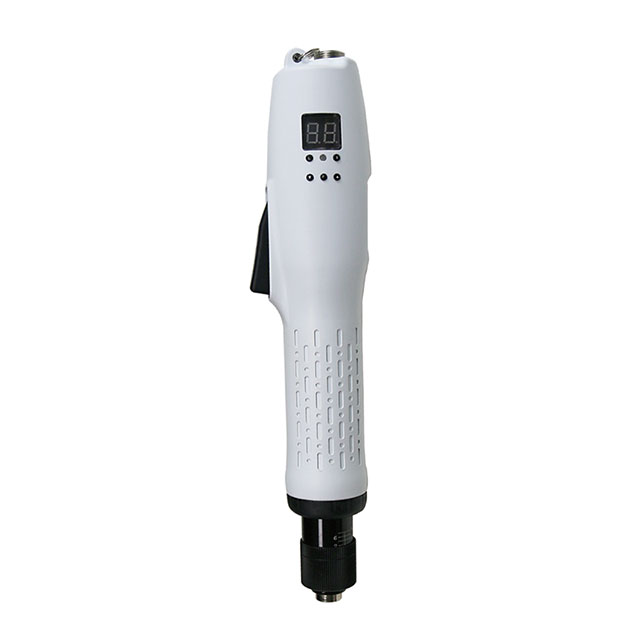
Before attempting an arc test, you must perform a rigorous tool inspection. Examine the handle for micro-cracks, deep gouges, or signs of chemical degradation. Look closely for carbon tracking, which appears as faint black spiderweb lines on the plastic. Carbon tracking indicates that high voltage has previously traveled across the surface, permanently compromising the insulation. Ensure the tool is completely dry. Even a thin film of morning dew or sweat destroys the dielectric strength of the handle, turning the outside of the tool into a conductor.
Environmental factors dictate whether testing is permissible. Never conduct an arc test in wet conditions. Do not test while standing in puddles, saturated mud, or wet tall grass. Water provides a highly conductive path to ground, increasing shock severity if the tool fails or if you accidentally brush against the live wire. Never test during thunderstorms or when lightning is visible in the distance. Lightning strikes on fence lines are lethal, unpredictable, and can travel miles down high-tensile wire.
Proper footwear and personal protective equipment act as secondary safety barriers. Wear heavy-duty, rubber-soled work boots. These isolate you from the earth, reducing the likelihood of current passing through your body if you make accidental contact. Insulated electrical gloves provide an additional layer of protection. While standard leather work gloves offer minimal electrical resistance, they are better than bare hands for preventing minor static shocks.

Executing the arc test requires precise hand movements and strict adherence to the sequence of operations. Rushing this process leads to equipment damage or operator shock.
Establish a Solid Ground: Plant the metal shaft firmly against a known ground source. When testing live-to-earth, press the shaft deep into damp soil or hold it hard against a galvanized metal T-post. If you are testing a multi-wire system, you must test between conductors. Bridge the live wire to the dedicated ground wire running parallel to it. A poor ground connection will result in a false negative, leading you to believe the fence is dead.
Position Your Body: Stand firmly with your feet shoulder-width apart. Hold the insulated handle firmly with your dominant hand. Place your non-dominant hand behind your back or in your pocket. This prevents a cross-chest shock pathway if an accident occurs.
Approach the Live Conductor: Slowly move the grounded metal shaft toward the live wire. Maintain your solid connection to the ground source. Do not make direct physical contact with the live wire. Stop moving the tool when the shaft is approximately two to three millimeters away from the live conductor.
Observe the Arc: Watch and listen for the spark jumping the air gap. The characteristics of the spark provide your diagnostic data.
Disengage Safely: Do not hold the arc for more than one or two seconds. Pull the tool away swiftly and cleanly to break the arc. Do not drag the tool along the wire, as this damages the galvanized coating.
Spark Characteristic | Audible Sound | Diagnostic Meaning |
|---|---|---|
Bright Blue, jumps a wide gap (3mm+) | Sharp, loud "snap" | High voltage present; fence section is healthy and well-grounded. |
Weak Yellow or Orange, requires close proximity | Dull, quiet "click" | Low voltage; indicates heavy weed load, cracked insulators, or poor splices. |
No Spark visible | Silence | Dead fence, severe short circuit nearby, or faulty ground connection during the test. |
Zone testing allows you to narrow down the location of a dead short without walking the entire perimeter. Use the arc test in conjunction with physical cut-out switches installed along the fence line. Walk to the middle of the fence line and open a cut-out switch to isolate the back half of the property. Test the live side of the switch coming from the energizer. If you draw a strong spark, the fault lies further down the line in the disconnected section. If there is no spark, the fault exists between the switch and the energizer. Repeat this halving process to isolate the fault to a specific paddock or zone.
Energizer isolation is a mandatory diagnostic step when the entire fence appears dead. Disconnect the energizer entirely from the fence line and the earth stakes. Test the output terminals directly. Bridge the gap between the red (live) and green (earth) terminals using the arc method. If you draw a strong, bright spark, the energizer is functioning correctly, and the fault is definitively on the fence line or the earth stakes. If the energizer produces a weak spark or no spark at all, the unit itself has failed. This rules out a faulty energizer before you waste hours walking kilometers of wire looking for a break.
Weighing accuracy against convenience reveals the true utility of the arc test. The immediate availability of a hand tool is its primary advantage. You likely have one in your truck, tractor cab, or tool belt right now. When a tree falls on a fence line during a storm, you need to know immediately if the line is live before attempting to clear the debris. However, this convenience comes at a steep cost to diagnostic accuracy. The arc test cannot diagnose complex issues. It will not identify partial shorts caused by cracked insulators that only leak voltage during heavy rain. It cannot detect poor, oxidized splices that cause excessive voltage drops across long distances. It certainly cannot evaluate degraded earth stakes buried deep underground.
The scalability of diagnostics is another major limitation. The manual arc method fails completely when managing multi-kilometer agricultural fencing. Walking miles of high-tensile wire and stopping to draw sparks every hundred yards is highly inefficient and physically exhausting. Multi-zone security arrays require precise fault localization. Modern security energizers monitor voltage return and trigger alarms based on specific voltage drops. A manual short circuit triggers false alarms, disrupts the security monitoring system, and alerts the monitoring company to a breach.
Compliance, liability, and professional escalation demand strict adherence to industry standards. Makeshift testing methods do not satisfy legal or insurance requirements. Many jurisdictions require specific compliance standards for security fences, mandating minimum voltage levels to ensure deterrence. Documented maintenance requires exact voltage readings recorded with calibrated digital equipment. If an incident occurs—such as livestock escaping onto a highway or a security breach—an insurance investigator will not accept an arc test as proof of proper maintenance. Define a strict threshold for field testing. Once you verify that a fault exists but cannot immediately locate a physical break or heavy vegetation, stop testing. Call a registered installer equipped with proper diagnostic gear.
High-voltage shock to the operator is the most severe risk associated with makeshift testing. This occurs when the operator bridges the gap with their body instead of the tool. Using a damp tool instantly compromises the dielectric barrier. Using a tool with a metal core that extends through the top of the handle provides a direct path for the 10kV pulse into your palm. Mitigation requires strict adherence to safety protocols. Use only fully insulated, solid-handle tools. Keep your non-dominant hand behind your back. This prevents a cross-chest shock pathway, which can disrupt cardiac rhythm and cause serious injury.
Damaging the energizer or the conductors is a frequent consequence of improper testing. Holding the dead short for too long causes excessive strain on older energizers. The internal capacitors must work overtime to recharge against a zero-resistance fault, which can lead to premature component failure. Furthermore, sustained arcing generates intense localized heat. This heat pits and damages the galvanized coating on the fence wire, exposing the raw steel beneath. This leads to rapid rust, increased electrical resistance, and eventual wire failure. Mitigation is simple. Limit the arc test to one or two seconds maximum. Always test at the furthest point from the energizer first to utilize the natural resistance of the fence line.
Repairing live systems introduces unnecessary danger. Operators often attempt to fix a fault immediately after locating it. They try to clear heavy vegetation, remove fallen branches, or twist a broken wire back together while the system pulses. This guarantees a severe shock. Mitigation requires physical isolation. Always physically disconnect the energizer before touching conductors. Turn the unit off and unplug it from the mains power or disconnect the battery. If you are far from the energizer, open a physical cut-out switch to de-energize the section before performing splices or clearing brush.
False negatives lead to dangerous assumptions. Testing against a poor ground results in no spark. Dry, sandy, or rocky soil has extremely high electrical resistance. The operator sees no spark and falsely assumes the fence is dead. They then grab the live wire to make a repair and receive a shock. Mitigation requires ground verification. Always verify your ground source. If the soil is dry, do not rely on it for an arc test. Test directly across the live and ground wires on a multi-wire system to ensure an accurate reading.
Identified Risk | Root Cause | Field Mitigation Strategy |
|---|---|---|
Operator Shock | Wet tool handle, strike-cap tool, or cross-chest pathway. | Use dry, solid-handle tools only. Keep non-dominant hand behind the back. |
Energizer Damage | Sustained dead short overloading internal capacitors. | Limit arc test duration to a maximum of 2 seconds. |
Wire Degradation | Plasma heat pitting the galvanized coating. | Do not drag the tool on the wire; break the arc cleanly and swiftly. |
False Negative Reading | Testing against dry, sandy, or rocky soil with high resistance. | Test against a dedicated ground wire or a deep-driven galvanized T-post. |
Procure a dedicated digital fence voltmeter or directional fault finder immediately to replace makeshift testing methods for routine maintenance.
Inspect all hand tools in your vehicle or equipment shed, permanently removing any strike-cap or cracked tools from electrical diagnostic use.
Install physical cut-out switches at regular intervals along your fence line to allow for safe, isolated zone testing and repairs.
Physically disconnect the energizer from its power source before attempting to clear vegetation, splice broken wires, or adjust insulators.
Schedule a comprehensive inspection with a registered fence installer if your system experiences chronic voltage drops that field testing cannot locate.
A: No. Standard mains testers are typically rated for 110V to 1000V. Electric fences operate at up to 10,000V. The high voltage will destroy the internal resistor, causing the tool to fail catastrophically or deliver a severe shock to your hand.
A: A lack of spark usually indicates a poor ground connection during the test, such as dry or sandy soil. It can also mean there is a severe dead short elsewhere on the fence line draining all the voltage before it reaches your testing point.
A: Rubber boots provide secondary insulation, but they do not make direct contact safe. You should never touch the live wire directly with the tool. Always maintain a small air gap to draw an arc, and ensure the tool handle is fully insulated and dry.
A: A weak, yellow spark accompanied by a dull click indicates low voltage. This is typically caused by a heavy weed load touching the wires, cracked insulators, or a failing ground system at the energizer. A healthy fence produces a bright blue spark.
A: Place the metal shaft firmly against the dedicated, uninsulated ground wire running parallel to the live wires. Slowly bring the side of the shaft within a few millimeters of the live wire to draw the arc across the two conductors.
A: Yes, if done improperly. Holding a dead short for more than a few seconds places immense strain on the energizer's capacitors. Always limit the arc test to one or two seconds to prevent overheating the energizer or pitting the galvanized fence wire.


