
T: +86-13302905061
E: sales@dongli2006.com
E: sales@dongli2006.com
Building 101, No.5 Rixing Street, Pingdong Community, Pingdi Street, Longgang District, Shenzhen, Guangdong, China.
Views: 0 Author: Site Editor Publish Time: 2026-09-10 Origin: Site


The transition from manual fastening to powered assembly introduces massive efficiency gains on the job site, but it fundamentally changes the risk profile of your daily technical tasks. Improper use of powered fastening tools directly leads to stripped threads, cam-out, cracked plastic housings, and destroyed sensitive components like PC motherboards or appliance control boards. You cannot treat these tools like standard drills. Mastering how to use an electric screwdriver requires a deep understanding of torque control, precise bit engagement, and application-specific tolerances. We see technicians ruin expensive hardware daily simply because they fail to calibrate their clutch or select the wrong drive profile. This guide breaks down exact operational techniques, field-tested risk mitigation strategies, and the strict evaluation criteria necessary to select the right tool for your specific technical requirements.
Torque Control is Critical: Utilizing the mechanical clutch prevents over-tightening, which is the primary cause of fastener and material failure in precision tasks.
Application Dictates Form Factor: Inline, pistol-grip, and hybrid screwdrivers serve distinct operational environments, from tight appliance chassis to open-panel electrical work.
Bit Selection Determines Success: Mismatched bits cause cam-out; exact engagement between the fastener recess and the driver bit is non-negotiable for powered applications.
Evaluation Requires Trade-offs: Selecting an electric screwdriver involves balancing RPM (speed) against maximum torque (power) and battery architecture (weight).
Table of Contents
Users often treat powered fastening tools as miniature drills. This misconception leads to catastrophic material damage on the job site. A drill is designed for high-speed material removal, while a powered driver is engineered for controlled rotational force. Understanding the mechanical differences between these tools is the absolute baseline for operational success. You must grasp how the internal components interact to protect both the fastener and the receiving material before you pull the trigger.

The mechanical clutch is the most important component of your tool. It functions as a fail-safe mechanism that physically disengages the drivetrain from the motor when a specific rotational force, known as torque, is reached. This physical separation prevents the motor from driving the screw deeper than intended. Inside the tool housing, a series of ball bearings and heavy-duty springs manage this tension. When the resistance from the screw exceeds the spring tension set by the user, the clutch slips. You will hear a distinct, rapid clicking sound when this happens.
You control this tension using the numbered collar located directly behind the chuck. The numbering system provides granular control over the output force. Lower numbers correspond to low spring tension. You use these settings for delicate materials like plastic housings, circuit boards, or softwoods. Higher numbers compress the internal springs, allowing the tool to deliver more torque before slipping. These settings are reserved for dense materials, heavy-duty appliance assembly, or driving long fasteners into hardwoods. Calibrating this collar correctly is the mandatory first step in any fastening operation.
Modern tools utilize different actuation methods to initiate motor rotation. Traditional models rely on trigger actuation. You pull a physical switch with your index finger to complete the circuit and start the motor. This design is familiar and offers excellent tactile feedback, especially when wearing heavy work gloves. Conversely, advanced models feature push-to-drive or gyroscopic actuation. With push-to-drive systems, the motor engages only when you apply direct axial pressure against the fastener. Gyroscopic models sense the rotation of your wrist to determine both the direction and speed of the drive shaft, offering highly intuitive control for precision benchtop tasks.
Regardless of the actuation type, variable speed control is non-negotiable. Variable speed triggers allow you to dictate the RPM based on how far you depress the switch. This feature plays a vital role during the initial thread engagement phase. Starting a screw at maximum RPM almost always results in cross-threading or the bit violently slipping out of the screw head. By feathering the trigger, you maintain absolute control. This ensures the threads catch properly before you ramp up the speed for the remainder of the drive cycle.
The chuck is the physical interface between the tool and the fastener. Most powered drivers utilize a standard 1/4-inch hex collet. This standardized sizing ensures compatibility with a vast ecosystem of aftermarket bits, nut setters, and extensions. The hex design prevents the bit from slipping inside the chuck under high torque loads. This is a massive improvement over the smooth cylindrical shanks used in traditional drill chucks, which frequently spin out under heavy resistance.
Bit retention mechanisms within the hex collet vary by model. Magnetic retention relies on a strong rare-earth magnet seated at the base of the collet. This system allows for rapid bit swaps and often magnetizes the bit itself, helping to hold the screw in place before driving. However, heavy vibration can sometimes dislodge bits from magnetic chucks. Mechanical quick-release locking mechanisms provide a much more secure solution. These chucks utilize a sliding collar that locks a steel ball bearing into the detent groove of the hex bit. This physical lock ensures the bit remains seated during high-torque applications or when backing out stubborn, rusted fasteners.
Operational success requires consistent, flush seating of fasteners without causing material distortion, stripping screw heads, or creating safety hazards. Achieving this requires a disciplined, phased approach to every fastening task. Skipping steps or rushing the process inevitably leads to damaged components and costly rework.
Phase 1: Pre-Operation and Power Isolation. Safety is the immediate priority, especially when working on infrastructure or appliances. Power isolation is mandatory. You must shut off circuit breakers or unplug units entirely before addressing appliances like water heaters, washing machines, or wall switches. Verify zero voltage with a multimeter before any tool touches a metal chassis.
Phase 2: Bit Selection and Alignment. Selecting the exact bit size is required. A Phillips #1 bit will fit into a Phillips #2 screw, but the resulting play will cause the bit to cam-out under power. Test the fit manually. The bit should lock into the fastener recess with zero wobble. Set the mechanical clutch to the lowest viable setting for the material. It is always better to start too low and adjust upward than to start too high and instantly strip the threads.
Phase 3: Engagement and Axial Pressure. Position the bit into the screw head and apply strict axial pressure. Push directly in line with the screw shaft. Your arm, the tool, and the fastener should form a perfectly straight line. If you apply pressure at an angle, the rotational force will push the bit out of the recess, damaging the screw head.
Phase 4: Driving the Fastener. Initiate the drive cycle by feathering the trigger. A slow start ensures the threads catch cleanly without cross-threading. Once the screw is engaged and tracking straight, increase the RPM. Throughout the drive cycle, maintain perpendicular alignment. Do not let the tool drift or tilt.
Phase 5: Seating and Inspection. As the screw head approaches the surface of the material, ease off the trigger slightly. Allow the mechanical clutch to engage. You will hear the distinct clicking sound as the drivetrain slips. Do not force the drive past this point. Trust the clutch to prevent over-tightening. Perform a quick visual inspection. Check the fastener head for burrs, sharp edges, or signs of cam-out.
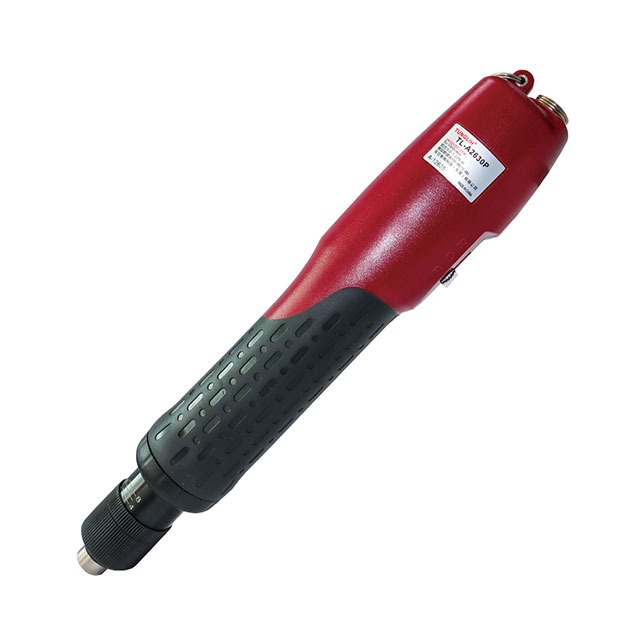
Different technical environments require vastly different operational approaches and tool specifications. A technique that works perfectly for framing a door will destroy a computer motherboard in seconds. Understanding the specific tolerances of your application is essential for deploying powered fastening tools effectively in the field.
Working on IT hardware demands strict adherence to low tolerances. The primary requirements are ultra-low torque output, electrostatic discharge (ESD) safety, and compatibility with precision bits like Torx, Pentalobe, and Tri-Wing. You must integrate the tool into a broader diagnostic toolkit alongside tweezers, multi-testers, power supply testers, and POST cards for rapid teardowns.
Execution in this environment prioritizes control over speed. Use the lowest possible clutch setting. When securing motherboards or delicate plastic chassis components, rely on the powered driver for the initial threading. Stop the motor just before the screw seats. Use the spindle lock feature to bypass the motor and apply the final quarter-turn manually. This hybrid approach guarantees that brass standoffs are not stripped and delicate fiberglass PCBs are not cracked under pressure.
Appliance repair introduces a different set of challenges. The requirements shift toward medium torque output, the use of extension bits for reaching recessed access panels, and strict adherence to power isolation protocols. Appliances often feature sheet metal screws driven into thin steel chassis, which are highly susceptible to stripping if over-torqued.
Execution frequently involves managing rusted or seized fasteners. When breaking factory seals or removing oxidized screws, use the tool in reverse with firm, sustained downward pressure. The steady rotational force of the motor is often more effective at breaking corrosion than manual twisting, which tends to jerk and strip the screw head. When reassembling water heaters or washing machines, calibrate the clutch to ensure sheet metal panels are held tightly without distorting the metal around the screw hole.
Facility maintenance and home infrastructure tasks require tools with insulated handles for electrical safety and the stamina for consistent, repetitive driving. The operational approach varies significantly based on the specific material being fastened.
When installing weatherstripping, precision prevents material distortion. Drive screws into pre-drilled pilot holes. Always start from the center of the door frame and work your way outward. This technique prevents the aluminum or vinyl weatherstripping from bowing or buckling. When replacing electrical switches, safety is paramount. After verifying power is off at the breaker, carefully back out the screws to gently pull the switch from the electrical box. This prevents stressing the old, brittle wiring. When installing the new switch, seat the faceplate screws on a very low torque setting to avoid cracking the fragile nylon housing.
Maintaining precision equipment like air rifles requires exacting torque specifications to maintain zero and ensure structural integrity. Components like pivot bolts, scope rings, and glass-bedding hardware are highly sensitive to uneven pressure.
In these scenarios, utilize the powered driver strictly for rapid initial threading. Do not use the motor to seat the fasteners. Instead, rely on calibrated manual torque drivers for final assembly. This ensures that the hardware is moderately snug but not over-tightened. Over-torquing scope rings can crush the optic tube, while uneven torque on glass-bedding hardware can introduce stress fractures into the stock, ruining the accuracy of the equipment.
Application Environment | Recommended Torque Range | Primary Fastener Types | Clutch Setting Strategy |
|---|---|---|---|
IT & PC Assembly | 0.1 Nm - 1.5 Nm | M3, M4, Standoffs, Torx | Lowest setting; finish manually |
Electrical Faceplates | 1.0 Nm - 2.0 Nm | Slotted, Phillips #1 | Low setting to prevent plastic cracking |
Appliance Chassis | 3.0 Nm - 5.0 Nm | Sheet metal screws, Hex head | Medium setting; test on scrap metal first |
Cabinetry & Woodwork | 5.0 Nm - 8.0+ Nm | Wood screws, Phillips #2, Square | High setting; adjust based on wood density |
Selecting the right tool requires assessing technical specifications and mapping them directly to your daily workflows. Purchasing a tool with excessive power for delicate tasks is just as detrimental as buying an underpowered tool for heavy maintenance. You must evaluate form factor, power architecture, and specific feature sets.
The physical shape of the tool dictates where and how it can be used. Inline models feature a straight, cylindrical design. They are best suited for precision electronics, computer repair, and accessing fasteners in tight clearances where a bulky handle would interfere. Pistol grip designs resemble traditional drills. They are superior for high-torque applications and repetitive tasks because the grip aligns the wrist naturally behind the chuck, reducing fatigue. Articulating or hybrid models feature a hinge that allows the tool to switch between inline and pistol configurations, offering maximum versatility for general facility maintenance.
Form Factor | Primary Application | Ergonomic Advantage | Torque Profile |
|---|---|---|---|
Inline | IT Repair, Precision Electronics | Fits in tight clearances, easy fingertip control | Low to Medium |
Pistol Grip | Appliance Repair, Woodworking | Reduces wrist fatigue during repetitive tasks | Medium to High |
Hybrid/Articulating | Facility Maintenance, HVAC | Adaptable to multiple spatial constraints | Variable |
Voltage directly correlates to the tool's maximum torque output. You must map the voltage to your primary application. A 3.6V or 4V system is ideal for IT repair and delicate electronics. These lower-voltage tools prioritize precision over raw power. Conversely, 8V systems deliver significantly more torque, making them necessary for heavy appliance maintenance and driving fasteners into dense materials.
Motor type is another critical evaluation dimension. Traditional brushed motors use carbon brushes to transfer electricity to the rotor. They are cost-effective but require maintenance and generate more heat. Brushless motors utilize electronic circuit boards to manage power delivery. While they carry a higher upfront cost, brushless motors provide longer battery runtime, require zero brush maintenance, and offer superior thermal management during sustained use on the job site.
Evaluate secondary features based on the specific outcomes they enable. Multi-bit compatibility is essential. The ability to quickly swap hex bits effectively replaces manual 5-in-1 tools, allowing you to adapt to diverse fastener types instantly. LED work lights are mandatory for visibility. They illuminate dark appliance interiors, such as the inside of a washing machine cabinet or deep server racks. Finally, a spindle lock is a required feature. It locks the drivetrain when the motor is not running, allowing you to use the tool as a traditional manual screwdriver to apply heavy manual torque to break loose stubborn or rusted screws.
Adopting powered fastening tools introduces specific risks to your workflow. If you do not actively manage these risks, the efficiency gains of the tool will be negated by the cost of repairing damaged materials. Addressing the most common points of failure is essential for safe implementation.
Cam-out is the most frequent point of failure. This occurs when the bit slips out of the screw head at high RPM, instantly destroying the fastener recess and potentially scratching the surrounding material. The risk increases with mismatched bits and insufficient pressure.
Mitigation requires a multi-faceted approach. First, upgrade your consumables. Invest in precision-milled bits from reputable manufacturers. High-quality bits feature exact geometries that lock tightly into the fastener. Second, maintain strict axial pressure. You must physically hold the bit down into the screw head against the rotational force trying to push it out. Finally, utilize lower RPMs. Speed is the enemy of control. Slower rotation allows you to monitor the bit engagement and stop immediately if slipping occurs.
Cross-threading is a catastrophic failure in precision assembly. The risk involves forcing a misaligned machine screw into a threaded metal insert. The hardened steel of the screw will cut new, incorrect threads into the softer metal of the insert, permanently destroying the receiving threads and ruining the chassis.
Mitigation relies on strict procedural discipline. Never use a powered tool to start a machine screw into a metal insert. Always start machine screws by hand. Turn the fastener manually for the first two full rotations. If you feel resistance immediately, the screw is misaligned. Back it out and realign it. Only engage the powered driver once you have verified that the threads are tracking perfectly straight and smooth.
Audit your current manual fastening tasks to identify your maximum torque requirements and spatial constraints.
Evaluate top-tier models that offer the specific chuck type, voltage, and ergonomic profile suited to your daily workflows.
Standardize your bit sets by investing in precision-milled hex bits that match the exact fastener profiles used in your facility.
Train your maintenance staff on proper clutch calibration and axial pressure techniques to prevent material damage.
Implement strict safety protocols regarding power isolation before using powered tools on appliances or electrical infrastructure.
A: Impact drivers use concussive rotational force to drive large fasteners into dense materials, offering massive torque without a clutch. Powered screwdrivers rely on continuous rotational force and feature a mechanical clutch. This makes them ideal for precision tasks, delicate materials, and preventing over-tightening.
A: While possible for very soft materials like pine or drywall using hex-shank drill bits, these tools lack the high RPM and chuck stability of dedicated drills. They are optimized for driving fasteners with controlled torque, not for efficient material removal.
A: The mechanical clutch disengages the motor from the drive shaft once a pre-set torque limit is reached. This fail-safe prevents over-tightening, stripped screw heads, and cracked housings in delicate assemblies.
A: Precision electronics require very low torque, typically between 0.1 and 1.5 Nm. Excessive torque can easily crack motherboards, strip brass standoffs, or permanently damage delicate plastic chassis components.
A: This phenomenon, known as cam-out, occurs due to mismatched bit sizes, insufficient axial pressure, or excessive RPM. Ensure you use the exact bit profile for the fastener and apply firm, straight pressure while driving.
A: No. Higher voltage provides more torque and power, which is excellent for heavy appliance repair. However, for delicate tasks like IT hardware assembly, lower voltage offers better precision and prevents accidental material damage.


